Installing Webmin

Webmin – a graphical web interface for managing a Linux server, written in Perl.
Official site: www.webmin.com

Here is an example of installing Webmin in Ubuntu.

Open the list of sources in a text editor:

nano /etc/apt/sources.list

Add this line to it:

deb http://download.webmin.com/download/repository sarge contrib
deb http://webmin.mirror.somersettechsolutions.co.uk/repository sarge contrib

We go to the temporary directory and import the key:

cd /tmp
wget http://www.webmin.com/jcameron-key.asc
apt-key add jcameron-key.asc

We update the list of sources:

apt-get update

We install the packages necessary for the correct operation of Webmin:

sudo apt-get install perl libnet-ssleay-perl openssl libauthen-pam-perl libpam-runtime libio-pty-perl libmd5-perl

Install Webmin:

apt-get install webmin

The installation is complete, to open the Webmin interface we will open in the browser https://HOST:10000
Installing the Webuzo Control Panel

For an example I’ll install the Webuzo control panel in Ubuntu 16.04 LTS.

Switch to the root user:

sudo -i

Download the installation script:

wget -N http://files.webuzo.com/install.sh

Make the script file executable:

chmod 0755 install.sh

Run the installation script:

./install.sh

We will wait until the installation is complete.
When the installation was complete, I had the following:

——————————————————–
Welcome to Webuzo Installer
——————————————————–
Installation Logs : tail -f /root/webuzo-install.log
——————————————————–
1) Installing Libraries and Dependencies
2) Setting UP WEBUZO
3) Downloading and Installing Webuzo
4) Downloading System Apps
—————————————————————-
/$$ /$$ /$$$$$$$$ /$$$$$$$ /$$ /$$ /$$$$$$$$ /$$$$$$
| $$ /$ | $$| $$_____/| $$__ $$| $$ | $$|_____ $$ /$$__ $$
| $$ /$$$| $$| $$ | $$ \ $$| $$ | $$ /$$/ | $$ \ $$
| $$/$$ $$ $$| $$$$$ | $$$$$$$ | $$ | $$ /$$/ | $$ | $$
| $$$$_ $$$$| $$__/ | $$__ $$| $$ | $$ /$$/ | $$ | $$
| $$$/ \ $$$| $$ | $$ \ $$| $$ | $$ /$$/ | $$ | $$
| $$/ \ $$| $$$$$$$$| $$$$$$$/| $$$$$$/ /$$$$$$$$| $$$$$$/
|__/ \__/|________/|_______/ \______/ |________/ \______/
—————————————————————-
Congratulations, Webuzo has been successfully installed
You can now configure Softaculous Webuzo at the following URL :
http://192.168.1.9:2004/
—————————————————————-
Thank you for choosing Webuzo !
—————————————————————-

After that I opened in the browser http://192.168.1.9:2004/, indicated the invented username and password, email and domain/IP name on which Webuzo will work.
This completes the installation and displays the following information:

You can login to the Webuzo Admin Panel using your root details at the following URL :
http://192.168.1.9:2004/
To start installing Apps you can login with the following details :
URL : http://192.168.1.9:2002/
Username : admin
Password : (the one you entered)
We request you to please register for updates and notifications at :
http://www.softaculous.com/board/index.php?act=register It also inspires us when you register. Registration is free and just a one minute job.
If you need any support you can always count on us. Just drop in at our Support Board:
http://www.webuzo.com/forums
Alternatively, you can contact us via Email at support@webuzo.com
Thank you for choosing Webuzo!

Since a free version of Webuzo is installed, many utilities and modules will become available only after upgrading to the premium version of Webuzo.

Installation Kloxo-MR – a free control panel for servers

Kloxo-MR – a free control panel for servers based on Kloxo (https://github.com/lxcenter/kloxo).

At hand I had CentOS 6.9, the recommended version of Minimal.
The official source of Kloxo-MR is mratwork.com and github.com/mustafaramadhan.

Switch to the root user, if not under it:

su -

Update the system:

yum update -y

Install the necessary components:

yum install yum-utils yum-priorities vim-minimal subversion curl zip unzip telnet wget -y

Download the installation script:

cd /tmp
rpm -ivh https://github.com/mustafaramadhan/rpms/raw/master/mratwork/release/neutral/noarch/mratwork-release-0.0.1-1.noarch.rpm

Remove the cached packages and update the RPM mratwork:

yum clean all
yum update mratwork-* -y

Install the Kloxo-MR:

yum install kloxomr7 -y
sh /script/upcp

The installation process can take a long time – we wait.

When the installation is complete, restart the server:

reboot

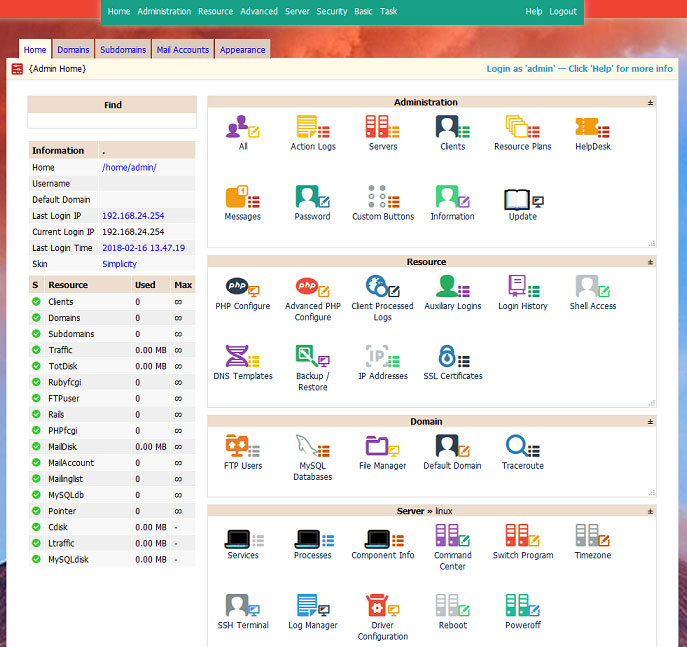
Kloxo-MR can be opened in the browser http://SERVER:7778 and https://SERVER:7777.
The default login and password are admin.

You can restart it like this:

sh /script/restart-all -y

Check this:

netstat -tulpn | grep :7777