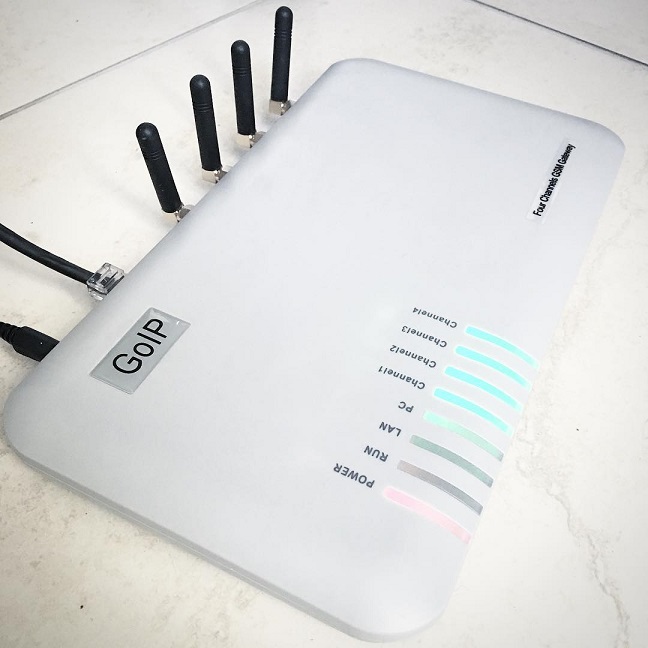
On the test, I set up a Chinese GSM GOIP4 gateway with an Asterisk server as a trunk.
Insert a SIM card with the PIN request turned off.
Go to the GOIP4 gateway web interface, its standard IP address is 192.168.8.1 (when connected to the PC port), the login and password are the same – admin.
There are also accounts with limited capabilities “user” and “sms”.
In the “Configurations” – “Preferences” we specify the time zone, I have Time Zone: GMT+2 and disable IVR.
In “Configurations” – “Network” we will write down the desired static IP address for the LAN port, which is standardly obtained via DHCP.
In “Tools” – “Change Password” we will change passwords for users.
By the way, when connecting via telnet, the limitsh username and password that is specified in the web interface to the admin user is used.
Now in asterisk, in the users.conf configuration file, add SIP trunk, for example:
[goip4]
type=peer
usecallerid = yes
hidecallerid=no
host=192.168.50.50
context=goip4
qualify=yes
qualifyfreq=30
Let’s start setting up GSM channels in the GOIP4 gateway.
Let’s write the SIP trunk parameters:
In “Configurations” – “Basic VoIP” – “Config Mode”, select “Trunk Gateway Mode”.
In “SIP Trunk Gateway1” specify the IP address of the asterisk server.
The remaining fields will be left empty, in the Re-register Period (s), the standard is 0.
Delete Callee Prefix while Dialing: Enable
At the very bottom for the first channel where “Line 1 Routing Prefix” we specify 1, for the second 2, the third 3 and 4 for the fourth.
Click “Save Changes” to save the changes.
Configure the rules for incoming GSM calls.
In “Configurations” – “Call In” we specify “CID Forward Mode:” Use CID as SIP Caller ID “”.
For each channel, we indicate “Forwarding to VoIP Number: goip4”, “Dial Plan: 1” for the first, for the second 2, the third 3 and 4 for the fourth.
Alternatively, you can specify the SIM card numbers in the “Forwarding to VoIP Number” and leave the “Dial Plan:” blank so that the goip4 gateway sends the SIM card number as the destination number, instead of the word “goip4” (this is convenient for CDR statistics to see which number called).
Click “Save Changes” to save the changes.
Set up outgoing calls in “Configurations” – “Call Out”.
GSM Auto Redial: Disable
GSM Dial Timeout (s): 30
Call OUT via GSM: Enable
Dial Plan: 1: 1 (for the first channel), 2: 2 (for the second), etc.
In “Tools” – “Send USSD” you can send USSD requests, for example, check account status, etc.
In “Send SMS”, “SMS InBox” and “SMS OutBox” – send SMS, view incoming and outgoing, respectively.
Restart Asterisk, go to the console and see if trunk goip4 is active:
sudo service asterisk restart
asterisk -rvv
sip show peers
quit
Now configure the dial plan in the /etc/asterisk/extensions.conf file.
Add a goip4 context that is responsible for incoming calls (in my case, when a call is received on any of the SIMs, the phone calls 204 and 203 SIP simultaneously, then if there is no answer to 201):
[goip4]
exten => goip4,1,Dial(SIP/204&SIP/203,19)
exten => goip4,2,Dial(SIP/201,19)
exten => goip4,3,Hangup()
If SIM card numbers were specified in the goip4 settings in the “Forwarding to VoIP Number”, then the goip4 context, for example, will be like this:
[goip4]
;sim 1
exten => 0671234567,1,Dial(SIP/204&SIP/203,60)
exten => 0671234567,n,Hangup()
;sim 2
exten => 0951234567,1,Dial(SIP/204&SIP/203,60)
exten => 0951234567,n,Hangup()
;sim 3
exten => 0731234567,1,Dial(SIP/204&SIP/203,60)
exten => 0731234567,n,Hangup()
;sim 4
exten => 0681234567,1,Dial(SIP/204&SIP/203,60)
exten => 0681234567,n,Hangup()
To the existing SIP phone context, we will add a dialing plan (as you can see, I have Kyivstar in channel 1, Megafon in the second, Lifecell in the third, you should also duplicate the entries with the city code):
;KYIVSTAR
exten => _067XXXXXXX,1,Dial(SIP/goip4/1${EXTEN},60)
exten => _068XXXXXXX,1,Dial(SIP/goip4/1${EXTEN},60)
exten => _096XXXXXXX,1,Dial(SIP/goip4/1${EXTEN},60)
exten => _097XXXXXXX,1,Dial(SIP/goip4/1${EXTEN},60)
exten => _098XXXXXXX,1,Dial(SIP/goip4/1${EXTEN},60)
;Megafon
exten => _095XXXXXXX,1,Dial(SIP/goip4/2${EXTEN},60)
exten => _099XXXXXXX,1,Dial(SIP/goip4/2${EXTEN},60)
exten => _050XXXXXXX,1,Dial(SIP/goip4/2${EXTEN},60)
exten => _066XXXXXXX,1,Dial(SIP/goip4/2${EXTEN},60)
;Lifecell
exten => _073XXXXXXX,1,Dial(SIP/goip4/3${EXTEN},60)
exten => _093XXXXXXX,1,Dial(SIP/goip4/3${EXTEN},60)
exten => _063XXXXXXX,1,Dial(SIP/goip4/3${EXTEN},60)
By the way, you can send an SMS via GoIP4 with a GET request, for example (where admin and admin are the user and password, 1 is the channel number from which to send the message, then the recipient’s phone number and SMS text):
http://192.168.1.5/default/en_US/send.html?u=admin&p=admin&l=1&n=TELEPHONE&m=TEXT
You can reboot from Linux via wget:
sudo wget --user=admin --password=admin --auth-no-challenge http://192.168.1.5/default/en_US/reboot.html -O /dev/nulll
Send SMS:
wget --user=admin --password=admin --auth-no-challenge --post-data 'line=1&smskey=0000000e&action=SMS&telnum=XXX&smscontent=TEXT&send=Send' http://192.168.1.5/default/en_US/sms_info.html -O /dev/null
To view the delivery status of SMS and USSD responses:
http://192.168.1.5/default/en_US/send_status.xml?u=admin&p=admin
The signal level can be seen in the Status tab – the RSSI column (0 is bad, it is -133dBm; 1 is -111 dBm; 31 is the maximum, it is -51dBm or better; 99 is no signal).
See also my articles:
Updating the GoIP4 gateway firmware
Installing and configuring GoIP SMS server
Dear, please help for more details of configuration from GOIP-8 side