The solution to the warning “Lack of Free Swap Space on Zabbix Server”

Put somehow on a new Linux server Zabbix and immediately began to display the following warning:

Lack of Free Swap Space on Zabbix Server

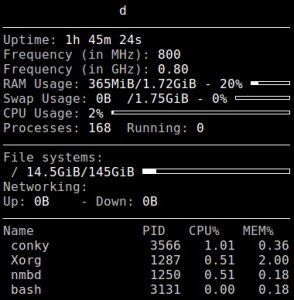
The warning says that there is no place in the Swap section, having seen that there is no Swap partition at all, it’s strange that when installing Ubuntu 14.04 LTS with the option to use the entire disk it was not created automatically, there was only 6 GB of RAM on the server.

On this solution of the problem in my case was the creation of the Swap partition, after which the warning disappeared.
Look another my article on this – How to create SWAP in Linux

Well, if there is a lot of RAM and it’s free basically, then Swap can make no sense, so you can simply turn off the trigger for this server creating a notification. To do this, open the Zabbix panel, go to the “Settings” tab – “Network nodes”, in front of this server, click “Triggers” and deactivate the trigger creating this warning.

Done.

The page break in the HTML document

I had to somehow make an HTML check template for a thermal printer, which after each page can make a tape break.

Since the check should have been broken into two parts, I did not touch the first part, and put the second part in the div tag with the style:

<div style="page-break-before:always;">
PAGE 2
</div>

Style “page-break-before” determines the gap in front of the page, so before the second page the tape was torn, well, and at the end of the printing process, the printer itself is breaking according to the settings of the printer. You can also specify that the gap should be executed after the page: “page-break-after” or “page-break-inside” inside the page.

I will describe the meaning:
always (always adds a page break)
auto (automatically adds a page break if it is required)
avoid (forbids page break)
left (skips one or two pages so that the next page is even when printing)
right (skips one or two pages so that the next page when printing is odd)
inherit (inherits the value)

The page break style can be specified for example in the table:

<table style="page-break-after:always">
</table>

Either in CSS:

table { page-break-after:always; }

Configuring the D-Link DES-3528 Switch

Today I configured the next switch D-Link DES-3528.

I will lay out the configuration below and briefly describe it.
When typing commands, you can use the TAB key so that the switch offers options, and after any command through a space, you can write a question mark “?” and see possible subcommands.

To view the current switch configuration, use the command:

show config current_config

Let’s get started.
We connect to the switch with a console cable at the speed of 9600 or at the standard IP address 10.90.90.90 and add the administrator (initially the login without login and password):

create account admin admin

Enable password encryption so that it is not stored in the config file open:

enable password encryption

Add vlan for management and for users (I have 207 core for management, 226 for users, 25 use port as uplink):

create vlan core tag 207
config vlan core add tagged 25
create vlan local_smart tag 226
config vlan local_smart add untagged 1-28
config port_vlan 1-28 acceptable_frame admit_all pvid 226
config vlan default delete 1-28

Change the IP address of the switch and specify the gateway:

config ipif System ipaddress 192.168.0.50/24 vlan core
create iproute default 192.168.0.1 1 primary

Let’s enable the restriction of broadcast traffic on client ports:

config traffic control 1-24,26-28 broadcast enable action drop broadcast_threshold 100 countdown 0 time_interval 5

Enable loop protection on client ports:

enable loopdetect
config loopdetect recover_timer 300 interval 10 mode port-based
config loopdetect log state enable
config loopdetect ports 1-24,26-28 state enable
config loopdetect trap loop_detected

Enable traffic segmentation so that clients do not see each other:

config traffic_segmentation 1-24,26-28 forward_list 25
config traffic_segmentation 25 forward_list 1-24,26-28

We will enable DHCP server locks on the client side so that they do not distribute IP:

config filter dhcp_server ports 1-24,26-28 state enable
config filter dhcp_server illegal_server_log_suppress_duration 30min
config filter dhcp_server trap_log enable

Let’s specify which IPs are allowed to log on to the switch (so that users do not see it):

create trusted_host network 192.168.0.2/32 snmp telnet ssh http https ping
create trusted_host network 192.168.1.5/32 snmp telnet ssh http https ping

Set up SNMP if you need it:

enable snmp
delete snmp community public
delete snmp community private
delete snmp user initial
create snmp community NAME view CommunityView read_only

Turn on the protection against BPDU flood:

enable bpdu_protection
config bpdu_protection recovery_timer 2400
config bpdu_protection log none
config bpdu_protection ports 1-24,26-28 state enable
config bpdu_protection ports 1-28 mode drop

Enable switch protection so that if the processor is fully loaded, you can go to it:

config safeguard_engine state enable utilization rising 100 falling 95 trap_log enable mode fuzzy

If necessary, configure the time synchronization with the NTP server:

enable sntp
config time_zone operator + hour 2 min 0
config sntp primary 10.0.0.18 poll-interval 5000

This completes the basic configuration of the D-Link DES-3528 switch.

Installing MIB in Ubuntu and Solving the Error “SNMP Cannot Find Module …”

Has noticed an error after executing the command snmpwalk with the indication of MIB instead of OID:

snmpwalk -v 2c -c public 192.168.0.1 ifIndex
ifIndex: Unknown Object Identifier (Sub-id not found: (top) -> ifIndex)

And:

For error such as:
Cannot find module (HOST-RESOURCES-MIB): At line 0 in (none)
Cannot find module (HOST-RESOURCES-TYPES): At line 0 in (none)
Cannot find module (SNMPv2-TC): At line 10 in /usr/share/mibs/netsnmp/UCD-DLMOD-MIB
Cannot find module (SNMPv2-SMI): At line 34 in /usr/share/mibs/netsnmp/UCD-SNMP-MIB
Cannot find module (SNMPv2-TC): At line 37 in /usr/share/mibs/netsnmp/UCD-SNMP-MIB
Did not find ‘enterprises’ in module #-1 (/usr/share/mibs/netsnmp/UCD-SNMP-MIB)
Did not find ‘DisplayString’ in module #-1 (/usr/share/mibs/netsnmp/UCD-SNMP-MIB)
Did not find ‘TruthValue’ in module #-1 (/usr/share/mibs/netsnmp/UCD-SNMP-MIB)
Unlinked OID in UCD-SNMP-MIB: ucdavis ::= { enterprises 2021 }
Undefined identifier: enterprises near line 39 of /usr/share/mibs/netsnmp/UCD-SNMP-MIB
Did not find ‘DisplayString’ in module #-1 (/usr/share/mibs/netsnmp/UCD-DLMOD-MIB)
Did not find ‘ucdExperimental’ in module UCD-SNMP-MIB (/usr/share/mibs/netsnmp/UCD-DLMOD-MIB)
...

We look at the tree of mibs:

snmptranslate -Tp

The solution to the above errors is the execution of the following commands:

sudo apt-get install snmp-mibs-downloader
sudo download-mibs
sudo sed -i "s/^\(mibs *:\).*/#\1/" /etc/snmp/snmp.conf
sudo service snmpd restart

Why the Far Cry 4 progress not saving?

I noticed once on one computer that the game Far Cry 4 can not save the game.

Far Cry 4 itself was not installed, but was moved from another computer to the folder + transferred to Save to Documents.

The reason for not saving was probably different owners to the files and directory of the game, this quickest solution is right-clicking on the game’s shortcut, then “Properties” – tab “Compatibility” and setting the checkbox “Run this program as administrator“, click “ОК“.

Done, there should not be any problems with saving.

SNMP MIBs and OIDs for Ubiquiti PowerBeam 5AC

I wrote a template for Ubiquiti PowerBeam 5AC for Zabbix and explored several basic SNMP OIDs for which you need to draw graphics.
OID tested for devices that are configured in Station mode and with firmware v7.1.4 (XC).

You can check the OID from a Linux command, for example:

snmpwalk -v 1 -c public 192.168.1.20 .1

First of all, I looked at what interfaces there are (if you add VLAN, etc. on the device, their number can be shifted):

snmpwalk -v 1 -c public 192.168.1.20 ifDescr

The next MIBs can read incoming and outgoing traffic (I have LAN eth0 under index 4, WLAN ath0 under 10), for example for LAN traffic:

ifInOctets.4
ifOutOctets.4

Average CPU usage per 1min / 5min / 15min:

1.3.6.1.4.1.10002.1.1.1.4.2.1.3.1
1.3.6.1.4.1.10002.1.1.1.4.2.1.3.2
1.3.6.1.4.1.10002.1.1.1.4.2.1.3.3

TX and RX AP in kilobytes can be found by the following OID:

1.3.6.1.4.1.41112.1.4.7.1.17.1.4.24.214
1.3.6.1.4.1.41112.1.4.7.1.18.1.4.24.214

OID noise can be found by:

1.3.6.1.4.1.41112.1.4.7.1.4.1.4.24.214

Signal strength: 1.3.6.1.4.1.41112.1.4.5.1.5.1
Frequency: 1.3.6.1.4.1.41112.1.4.1.1.4.1
SSID: 1.3.6.1.4.1.41112.1.4.5.1.2.1
Uptime: 1.3.6.1.2.1.1.3.0
Free memory: 1.3.6.1.4.1.10002.1.1.1.1.2.0
Total Memory: 1.3.6.1.4.1.10002.1.1.1.1.1.0
MAC address of the access point to which the device is connected: 1.3.6.1.4.1.41112.1.4.5.1.4.1
The IP address of the access point to which the device is connected: 1.3.6.1.4.1.41112.1.4.7.1.10.1.4.24.214.232.12.159
Antenna type: 1.3.6.1.4.1.41112.1.4.1.1.9.1

See also:
SNMP OID and MIB for interfaces