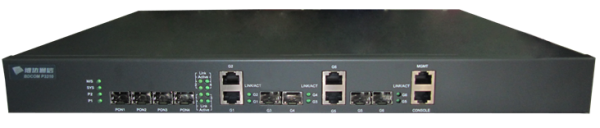
I’ll give you an example of viewing information about ONT (ONU) on EPON OLT BDCOM P3310C, on other models is essentially the same.
Continue reading “How to view information about ONU on BDCOM OLT”Category Archives: Hardware
The Asus router reboot script
On old router firmware Asus often noticed that the web interface is not fully open, not all the menus are displayed, so it can not be configured accordingly and can not be restarted if remote access is also available, since the reset button is not displayed.
So he took the Asus RT-N12E router, ran the Wireshark sniffer, opened the web interface of the router and pressed the reboot button.
In the intercepted packets, you could see that the Reboot.asp file is being rebooted in the root directory.
This resulted in a script for rebooting Asus routers:
#!/bin/sh
ROUTER_IP="192.168.1.1"
USERNAME="admin"
PASSWORD="admin"

# exit if router is down
ping -q -c 1 "$ROUTER_IP" > /dev/null || exit

curl --basic --user "$USERNAME:$PASSWORD" -A "Mozilla/4.73 [en] (X11; U; Linux 2.2.15 i686)" --refer "http://$ROUTER_IP" "$ROUTER_IP/Reboot.asp"
The contents of the script will be placed in a new file, for example, using the nano editor (“CTRL+X” to exit and “y” to save the changes):
nano file.sh
Let’s make it executable:
chmod 777 file.sh
After this, we execute:
./file.sh
You can also manually open the link http://192.168.1.1/Reboot.asp in the browser if you need to reboot the router once.
How to remove ONT from the BDCOM OLT configuration
Suppose you registered ONT or it registered itself on BDCOM OLT as I described in this article – Configuring BDCOM P3310 EPON
Now to remove it from the configuration, connect to OLT and go into the configuration mode:
enable
config
Continue reading “How to remove ONT from the BDCOM OLT configuration”
Firmware Update for D-Link DES-3028 Switch
First, download the new firmware from the official website of D-Link
http://forum.dlink.ru/viewtopic.php?f=2&t=92700
https://ftp.dlink.ru/pub/Switch/DES-3028/Firmware/
Configuring sFlow on D-Link Switches
sFlow – Traffic analysis protocol, similar to NetFlow.
Enable/disable sFlow on the switch:
enable/disable sflow
Viewing parameters:
show sflow
show sflow flow_sampler
show sflow counter_poller
show sflow analyzer_server
Adding/modifying the sFlow analyzer server:
create/config sflow analyzer_server 1-4 owner NAME timeout 1-2000000(sec)/infinite collectoraddress ADDRESS collectorport udp_PORT maxdatagramsize 300-1400
Example of removing the sFlow analyzer server:
delete sflow analyzer_server 1-4
Creating, modifying, deleting the sFlow polling counters:
create/config sflow counter_poller ports NUMBER/all analyzer_server_id 1-4 interval disable/20-120(sec)
delete sflow counter_poller ports NUMBER/all
Create, modify, delete sFlow sample ports:
create/config sflow flow_sampler ports NUMBER/all analyzer_server_id (1-4) rate value 0-65535 tx_rate value 0-65535 maxheadersize value 18-256
delete sflow flow_sampler ports NUMBER/all
I will give an example of setting:
enable sflow
create sflow analyzer_server 1 owner Linux collectoraddress 192.168.1.5 collectorport 6343
create sflow counter_poller ports 1 analyzer_server_id 1 interval 20
create sflow flow_sampler ports 1:1 analyzer_server_id 1 rate 1000 maxheadersize 128
Configuring HTTP on Cisco
Connect to the Cisco switch and go into elevated privilege mode:
enable
Now go into the configuration mode:
configure terminal
Enable HTTP:
ip http server
ip http authentication local
If necessary, you can disable HTTP and HTTPS as follows:
no ip http server
no ip http secure-server
Add a user if it does not exist:
username NAME privilege 15 secret PASSWORD
If you want to allow HTTP access to only certain IPs, then let’s see what rules there are on the switch:
exit
show access-list
show ip access-lists
configure terminal
If there is no necessary rule, then we will create:
access-list 10 permit 192.168.1.22
access-list 10 permit 192.168.3.10
See my article – Restricting access to the Cisco Catalyst 6500 management
Apply the rule to HTTP:
ip http access-class 10
To cancel it is possible so:
no ip http access-class 10
If you need to specify the maximum number of connection attempts:
ip admission max-login-attempts 5
show ip admission configuration
Leave their configuration mode and save the configuration:
exit
write
See also:
Configuring Cisco devices
SNMP OID for Teleste Luminato
Download the MIB archive by opening the Teleste Luminato web interface and selecting “Administration” – “Services” – “SNMP” – “Download MIBs”.
To get an OID from a MIB, you can use a converter, for example “Paessler MIB Importer and Converter”.
Using third-party SFP modules in Cisco switches
Suppose we connected a third-party module to the first SFP port, we’ll look at the information about it:
show idprom int GigabitEthernet 1/1
In my case, on the Cisco Catalyst 6509-E, very many ports with third-party SFP modules after some time they turned off and in the logs information was written that the module was not supported.
Now go into the configuration mode:
enable
config t
And we will make sure that the interfaces are not disabled when third-party SFP modules are enabled by entering the following commands:
service unsupported-transceiver
no errdisable detect cause sfp-config-mismatch
no errdisable detect cause gbic-invalid
After that, everything worked well.
See also:
Configure Cisco Catalyst 6509-E
Configuring TP-Link EP110
On the test I will connect TP-Link EP110 ONT to BDCOM P3310B-2AC EPON OLT.
To configure the TP-Link EP110, you must connect it to the computer with a cable and type in the address bar of the browser http://192.168.1.1, then disable the DHCP server from the menu by unchecking DHCP.
It is also necessary to select the ONT mode as shown in the figure below:

After that, TP-Link EP110 will work and register similarly to other ONTs, such as BDCOM P1501C1, FOXGATE 1001w, etc.
See also:
Configuring the BDCOM P3310 EPON
Configuring NetFlow on Cisco
Let’s say we have a collector running like I wrote in this article – Installing and using flow-tools
Now connect to the Cisco switch, for the test, I connect to the Cisco Catalyst 6509-E.
Now go into the configuration mode: