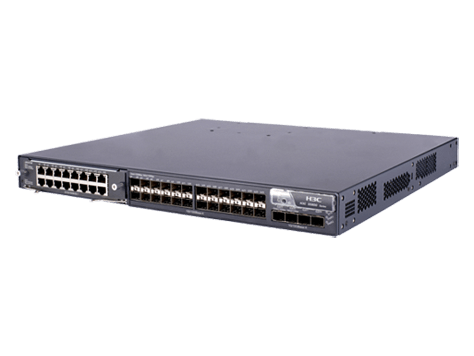
Solution of error “The transceiver type is not supported by port hardware” on HP A5800

I noticed once on the switch HP A5800 Series Switch JC103A, when inserting the module Foxgate SFP-1SM-1550nm-10SC (10km), the following error:

%Apr 26 12:18:56:384 2000 HP OPTMOD/4/MODULE_IN:
 GigabitEthernet1/0/24: The transceiver is UNKNOWN_SFP_PLUS.
%Apr 26 12:18:56:524 2000 HP OPTMOD/5/CHKSUM_ERR:
 GigabitEthernet1/0/24: The checksum of transceiver information is bad!
%Apr 26 12:18:56:674 2000 HP OPTMOD/3/TYPE_ERR:
 GigabitEthernet1/0/24: The transceiver type is not supported by port hardware!

Alternatively, you can try running the command:

transceiver phony-alarm-disable

But in my case this command did not help.
Also noticed that the error did not occur when inserting a similar module is not at 10km, but at 3km – Foxgate SFP-1SM-1550nm-3SC 3km.

The problem was solved by updating the firmware of the switch, as I did in the article – HP A5800 Firmware Upgrade
I updated the firmware from “A5800_5820X-CMW520-R1809P11” to “A5800_5820X-CMW520-R1810P13”.
After the upgrade, both modules were working and there were no errors in the console.

See also:
Using third-party SFP modules in Cisco switches

Updating the GI Matrix Lite’s firmware

There are several options for updating the GI Matrix Lite firmware:
1) Using USB flash drive
2) From the computer through the RS-232 port
3) From the Master receiver to the Slave receiver through the RS-232 ports
4) Through the Internet
5) From the satellite

On the test I will give an example of updating the firmware using a USB stick.

First of all we make a backup copy of the firmware by connecting the USB flash drive to the receiver and selecting MENU – System – Save to USB – OK
And also save the keys MENU – Conditional access – CA setting – Edit keys – press the green button, after that the file mcaskey.bin appears on the flash drive.

So:

1) Download the latest firmware from the Internet or for example from here
https://files.ixnfo.com/Firmware/GI_Matrix_lite/ALI3612_0E060B00_galaxy_140_combo_official_synaps_1CA_0CI_1.5.69.rar

2) Unpack the firmware file from the archive if it is in it and copy it to a USB flash drive, then connect the USB flash drive to the receiver.

3) Open MENU – System – Update via USB, select the firmware file, select the update type, then Start and OK.

At the end, the receiver will reboot itself.
At the time of updating, you can not turn off the power of the receiver or turn off the USB flash drive.

How to upgrade the firmware on D-Link DI-804HV

To update the firmware of the router D-Link DI-804HV, perform the following necessary steps:

1) Let’s see the revision on the label under the router and download the new firmware from the official site for it http://ftp.dlink.ru/pub/Router/DI-804HV/Firmware/
Updating the firmware of the router for the wrong revision can lead to its failure.

2) Open the settings of the router by typing in the browser its address, for example http://192.168.1.1 or 192.168.0.1 and enter login/password (can be “user” without password).

3) In the opened interface at the top, open the “Tools” tab, on the left of the menu, select “Firmware“. The current page will show the current version of the firmware, if it is older, then click “Browse” and select the previously downloaded new firmware file, then click “Apply” to start the process updates.

We will wait for the update to complete, usually 2-5 minutes. When finished, the router will reboot.

Done.

Solving the problem when upgrading iLO 3 “98% Receiving Image…”

Updated somehow iLO 3 from version 1.10 to 1.88, on the HP ProLiant DL380 G7 server and the process stopped at “98% Receiving Image…

So, if the firmware version of iLO 3 is lower than 1.28, then you must first upgrade to version 1.28, and then higher.

That’s the whole solution to the problem.

The Asus router reboot script

On old router firmware Asus often noticed that the web interface is not fully open, not all the menus are displayed, so it can not be configured accordingly and can not be restarted if remote access is also available, since the reset button is not displayed.
So he took the Asus RT-N12E router, ran the Wireshark sniffer, opened the web interface of the router and pressed the reboot button.
In the intercepted packets, you could see that the Reboot.asp file is being rebooted in the root directory.

This resulted in a script for rebooting Asus routers:

#!/bin/sh
ROUTER_IP="192.168.1.1"
USERNAME="admin"
PASSWORD="admin"

# exit if router is down
ping -q -c 1 "$ROUTER_IP" > /dev/null || exit

curl --basic --user "$USERNAME:$PASSWORD" -A "Mozilla/4.73 [en] (X11; U; Linux 2.2.15 i686)" --refer "http://$ROUTER_IP" "$ROUTER_IP/Reboot.asp"

The contents of the script will be placed in a new file, for example, using the nano editor (“CTRL+X” to exit and “y” to save the changes):

nano file.sh

Let’s make it executable:

chmod 777 file.sh

After this, we execute:

./file.sh

You can also manually open the link http://192.168.1.1/Reboot.asp in the browser if you need to reboot the router once.

Configuring sFlow on D-Link Switches

sFlow – Traffic analysis protocol, similar to NetFlow.

Enable/disable sFlow on the switch:

enable/disable sflow

Viewing parameters:

show sflow
show sflow flow_sampler
show sflow counter_poller
show sflow analyzer_server

Adding/modifying the sFlow analyzer server:

create/config sflow analyzer_server 1-4 owner NAME timeout 1-2000000(sec)/infinite collectoraddress ADDRESS collectorport udp_PORT maxdatagramsize 300-1400

Example of removing the sFlow analyzer server:

delete sflow analyzer_server 1-4

Creating, modifying, deleting the sFlow polling counters:

create/config sflow counter_poller ports NUMBER/all analyzer_server_id 1-4 interval disable/20-120(sec)
delete sflow counter_poller ports NUMBER/all

Create, modify, delete sFlow sample ports:

create/config sflow flow_sampler ports NUMBER/all analyzer_server_id (1-4) rate value 0-65535 tx_rate value 0-65535 maxheadersize value 18-256
delete sflow flow_sampler ports NUMBER/all

I will give an example of setting:

enable sflow
create sflow analyzer_server 1 owner Linux collectoraddress 192.168.1.5 collectorport 6343
create sflow counter_poller ports 1 analyzer_server_id 1 interval 20
create sflow flow_sampler ports 1:1 analyzer_server_id 1 rate 1000 maxheadersize 128

Configuring HTTP on Cisco

Connect to the Cisco switch and go into elevated privilege mode:

enable

Now go into the configuration mode:

configure terminal

Enable HTTP:

ip http server
ip http authentication local

If necessary, you can disable HTTP and HTTPS as follows:

no ip http server
no ip http secure-server

Add a user if it does not exist:

username NAME privilege 15 secret PASSWORD

If you want to allow HTTP access to only certain IPs, then let’s see what rules there are on the switch:

exit
show access-list
show ip access-lists
configure terminal

If there is no necessary rule, then we will create:

access-list 10 permit 192.168.1.22
access-list 10 permit 192.168.3.10

See my article – Restricting access to the Cisco Catalyst 6500 management

Apply the rule to HTTP:

ip http access-class 10

To cancel it is possible so:

no ip http access-class 10

If you need to specify the maximum number of connection attempts:

ip admission max-login-attempts 5
show ip admission configuration

Leave their configuration mode and save the configuration:

exit
write

See also:
Configuring Cisco devices